While flowers have always had a place in pastry, they’ve typically been relegated to mere decoration.
In the right hands, however, edible flowers can infuse cookies, bonbons, plated desserts and showpieces with flavor, color, texture and visual drama.
At the Institute of Culinary Education, students in Pastry & Baking Arts explore techniques that range from classic marzipan roses to modern chocolate work, sugar paste flowers and infusions made with herbs and blossoms grown in the Institute's hydroponic garden.
At our New York City and Los Angeles campuses, students train in professional kitchen environments where design, flavor and technique come together.
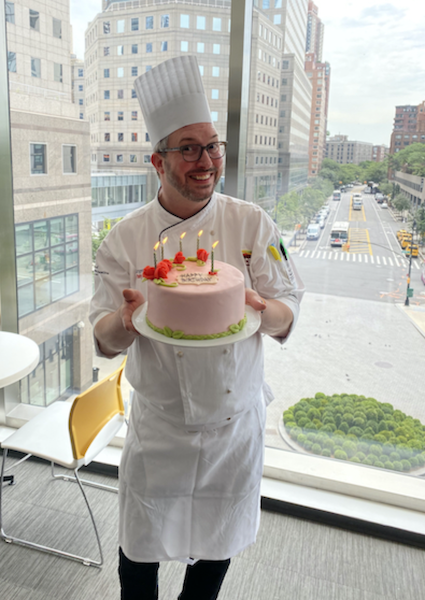
Below, Director of Pastry Research and Development Jürgen David highlights the ways in which pastry chefs can work with flowers — whether fresh, pressed, piped, molded or infused.
First Things First: Take Edible Flower Safety Seriously
Not every flower is safe to consume. Before using flowers in pastry, do the following:
- Confirm that the variety is edible and sourced for culinary use.
- Avoid flowers treated with pesticides or chemicals
- Do not use flowers picked from roadsides, public landscaping or unknown sources.
- Store-bought edible flowers may be several days old — ask a market employee when they were delivered.
- Consider dried flowers, which can offer a longer shelf life with a more concentrated or altered flavor.
- As with any new ingredient, edible flowers should be vetted and introduced carefully.
Marzipan Flowers
Marzipan is a classic pastry medium for shaping flowers. Made with almonds and sugar, its pliable texture makes it especially well-suited for roses, leaves and other lifelike botanical elements.
To make a marzipan rose:
- Flatten small rounds of marzipan into petals
- Gently bend and layer them around a center bud.
- Add green marzipan leaves and place the finished flowers on cakes, petit fours or celebration desserts.
Modeling Chocolate Flowers
Modeling chocolate is made from melted chocolate and sugar syrup. Unlike tempered chocolate, it remains pliable before drying firm, which makes it useful for shaping delicate petals. Why?
- Because modeling chocolate allows for thinner edges and a more refined finish.
- Because timing matters: if handled too long, the chocolate may become too soft; if left too long, it may harden and lose its shine.
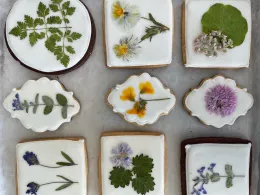
Flower Sugar Cookies
Sugar cookies offer a clean canvas for floral design. They can be flooded with royal icing, painted with gel food coloring or decorated using brush embroidery.
For brush embroidery:
- Outline the design with thick royal icing
- Use a slightly damp brush to pull the icing inward and create delicate, stitched-looking petals.
This technique requires patience, since layers of icing need time to dry between steps. The result, however, can be polished and highly detailed.
Silicone Flower Molds
Silicone molds are a quick way to create consistent floral decorations. Fondant, marzipan, modeling chocolate or another pliable paste can be pressed into the mold and un-molded immediately.
For clean results:
- Use a measured amount of paste for each mold.
- A very small amount of cornstarch or vegetable shortening can help prevent sticking.
- Luster dust can add shine, while marbling or layering colors can create more variation.
Buttercream Flowers
Buttercream flowers rely on the right recipe, the right piping consistency and the right piping tip. Using a flower nail and small parchment squares:
- Pipe one flower at a time, then move each piece to chill or set.
- Avoid overfilling the piping bag, since the warmth from your hands can soften the buttercream.
- Chill or freeze piped flowers to make them easier to place on cakes and desserts.
Tempered Chocolate Flowers
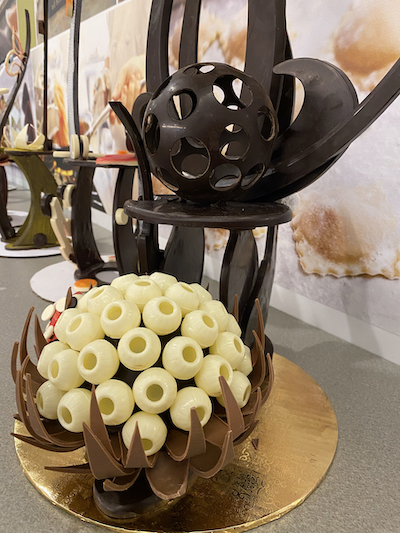
Tempered chocolate can create shiny, delicate petals with a crisp finish. Be warned, however, that this technique requires precision and a working knowledge of chocolate tempering.
To get started:
- Spread a thin layer of tempered chocolate over acetate
- Allow it to reach the cutting stage
- Cut petal shapes and curve them in a mold.
- Allow to set completely.
Attach petals around a chocolate center to build a flower shape.
Flower Infusions
Fresh or dried edible flowers can be infused into cream, butter, syrups, doughs or ganache, but keep the below in mind:
- Chamomile, lavender, rose, hibiscus and other botanicals add floral notes, but their intensity varies.
- Taste first and adjust carefully. Dried flowers often have a more concentrated flavor than fresh flowers, and some floral ingredients can become overpowering if overused.
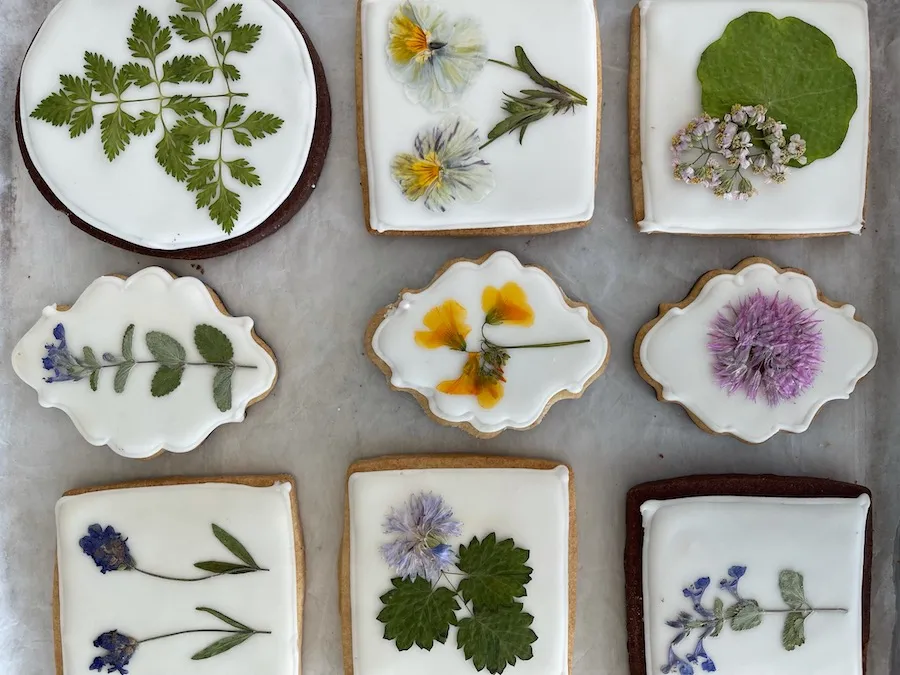
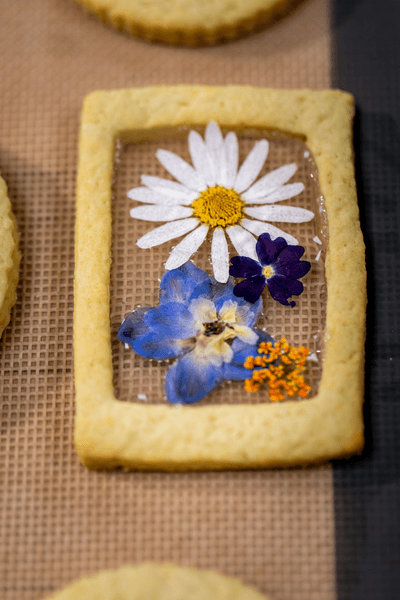
Pressed Flowers
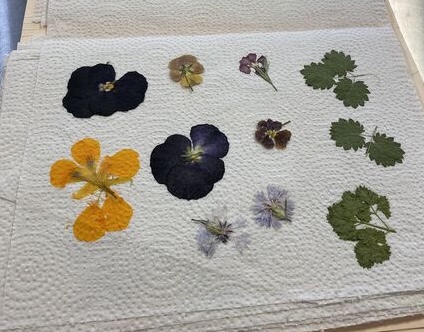
Pressed flowers can create a vintage, delicate look for cakes, cookies and plated desserts. The process requires careful selection, gentle handling and time.
To execute:
- Place flowers between absorbent paper and press them under heavy books or another flat weight.
- Allow them to dry fully before using, noting that humidity can slow the process (so plan ahead).
Fresh Flowers for Plated Desserts
For plated desserts, fresh edible flowers can add depth and contrast, but be sure to:
- Use fresh edible flowers at their peak
- Place your flowers thoughtfully — so they enhance the presentation rather than overwhelm it.
- As always, use only flowers confirmed as edible and culinary-safe.
Petals, leaves and pollen can all contribute to the final dish.
Sugar Paste Flowers
Sugar paste flowers require patience and precision. This is because:
- They have added vegetable gums — so they can be rolled very thin and shaped into realistic petals and leaves.
- Humidity can affect sugar paste — so bake extra time into your planning.
- Once dried, sugar paste flowers become fragile and porcelain-like — so clear sufficient and safe storage before you begin.
The technique can be time-intensive, but it allows for highly detailed floral work.
Growing Edible Flowers
Growing edible flowers gives pastry chefs more control over freshness, flavor and sourcing. In our hydroponic garden, Chef Jürgen has worked with farm manager Jackson Ibelle to grow flowers such as red clover, primrose and English daisies.
For pastry students, working with ingredients from the Institute’s hydroponic garden can connect technique with sourcing and seasonality — from harvesting chamomile for ganache to using fresh blossoms for plated desserts.
Final Thoughts on Working With Edible Flowers
- Confirm that every flower is edible before using it.
- Avoid flowers treated with pesticides or chemicals.
- Know your source.
- Taste before adding flowers to a recipe.
- Use fresh flowers quickly.
- Plan ahead for pressed, dried or sugar paste flowers.
- Remember that dried flowers may taste different from fresh ones.
🌼Study Pastry & Baking Arts with Chef Jürgen and his flowers.
Ingredients
- 135 grams heavy cream
- 10 fresh chamomile flowers, petals and leaves only
- ¼ vanilla bean, scraped
- 30 grams invert sugar or honey
- 260 grams white chocolate, melted
- 30 grams unsalted butter, softened
Directions
- Combine cream, chamomile, vanilla bean and invert sugar in a saucepan. Heat gently to infuse. Remove from heat and steep 5 minutes.
- Strain cream mixture. Discard chamomile and vanilla bean.
- Reheat cream without boiling. Pour over melted white chocolate.
- Stir with a small whisk, working from the center outward, until smooth and glossy.
- Cool ganache to 95°F
- Stir in softened butter until fully incorporated.
- Transfer ganache to a pastry bag.
- Pipe ganache into pre-cast chocolate molds, leaving space for the chocolate seal.
- Let centers set at room temperature.
- Seal molds with tempered chocolate.
- Let chocolate set and contract completely.
- Invert molds onto a parchment-lined sheet pan. Tap gently, if needed, to release bonbons.
Fast-Track Your Career
Discover the No. 1 Ranked Culinary School in America*