Food Photography 104: 6 Editing Tips That Make Food Look as Good as It Tastes

You found the light. You chose the right angle. You captured texture and movement. Now what?
Editing enhances what was captured in a photo — whether that’s the glow of natural light, the rich colors in a dish or the sharpness of a food’s texture.
“When you edit an image, you want to support the food, not overpower it,” says Anthony Leo, Assistant Director of Social Media at ICE. “You want the viewer to crave the dish — not notice the filter.”
Here, we’ll cover simple, approachable editing techniques that make your food look its best while keeping it real.
Note: Adobe Lightroom is an industry-standard editing tool, but many computers and smartphones offer similar settings that allow you to make the adjustments covered below.
Keep it Natural
Before you start playing around with editing, a word of caution. Subtlety is key. Overly filtered photos can look flat, distorted and, at worst, fake. Instead, think of editing as fine-tuning.
Leo recommends avoiding heavy, pre-made filters. “A lot of presets apply the same treatment to every photo, and food isn’t one-size-fits-all,” he explains. “What works for a beach sunset won’t work for a bowl of pasta.”
Step 1: Adjust Light and Exposure
Lighting adjustments are often the first — and most important — step in editing.
Start with exposure (sometimes labeled brightness). If the image looks too dark, gently raise it. If it feels blown out or harsh, lower it slightly.
Next, look at highlights and shadows:
- Lowering highlights can bring detail to bright areas like white plates or chef coats.
- Lifting shadows can reveal texture in darker areas.
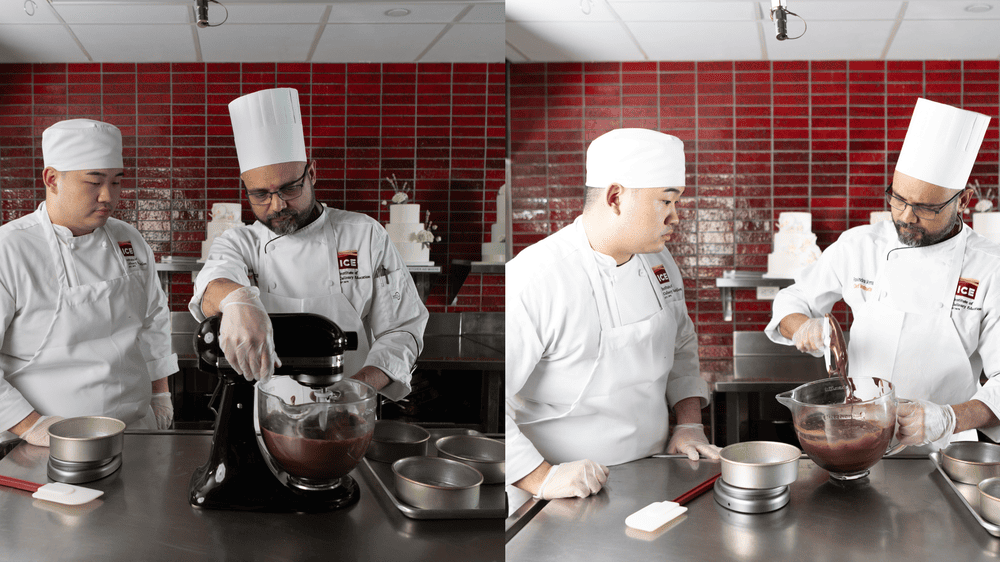
Leo offers the following example: “If a chef’s white coat is glowing too brightly, reducing highlights helps bring detail back into the fabric.”
Step 2: Refine Color & Saturation
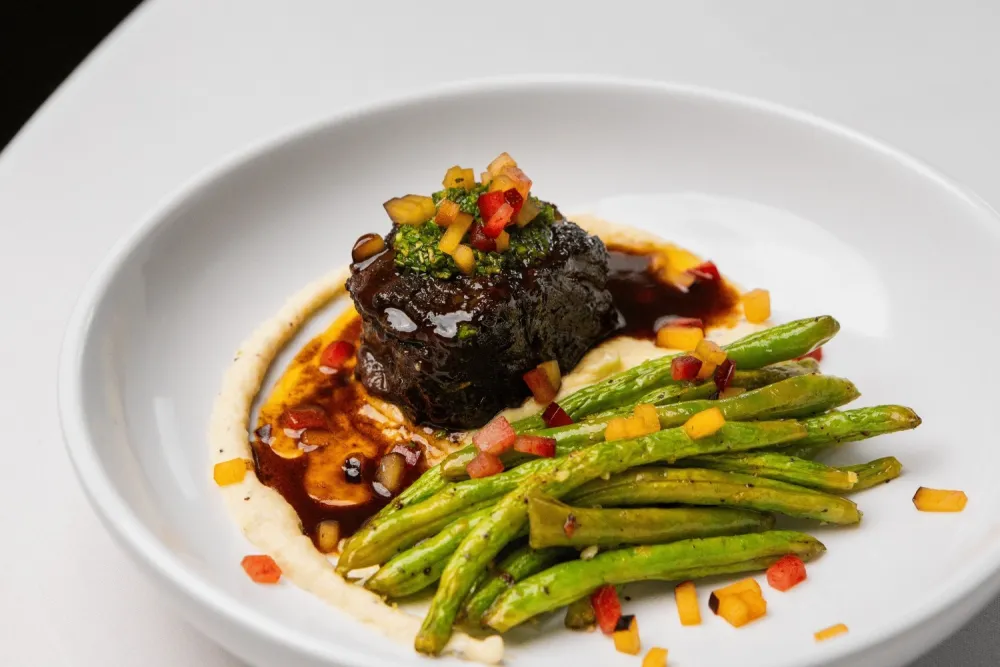
Color is one of the most powerful appetite triggers in food photography, which makes it especially important when showcasing culinary work.
Start with white balance. If your image looks too warm (yellow tones) or too cool (blue tones), adjust the temperature slider until the whites look neutral. Plates, tablecloths and chef coats are great reference points.
Then adjust the image’s vibrance and saturation as needed:
- Vibrance boosts muted colors.
- Saturation increases intensity across all colors.
Leo prefers vibrance for food photography. “It brings life back into the image without making it look neon,” he says.
Think ripe tomatoes, golden pastries, fresh herbs and juicy proteins — you want their colors to pop, but you also want them to look realistic.
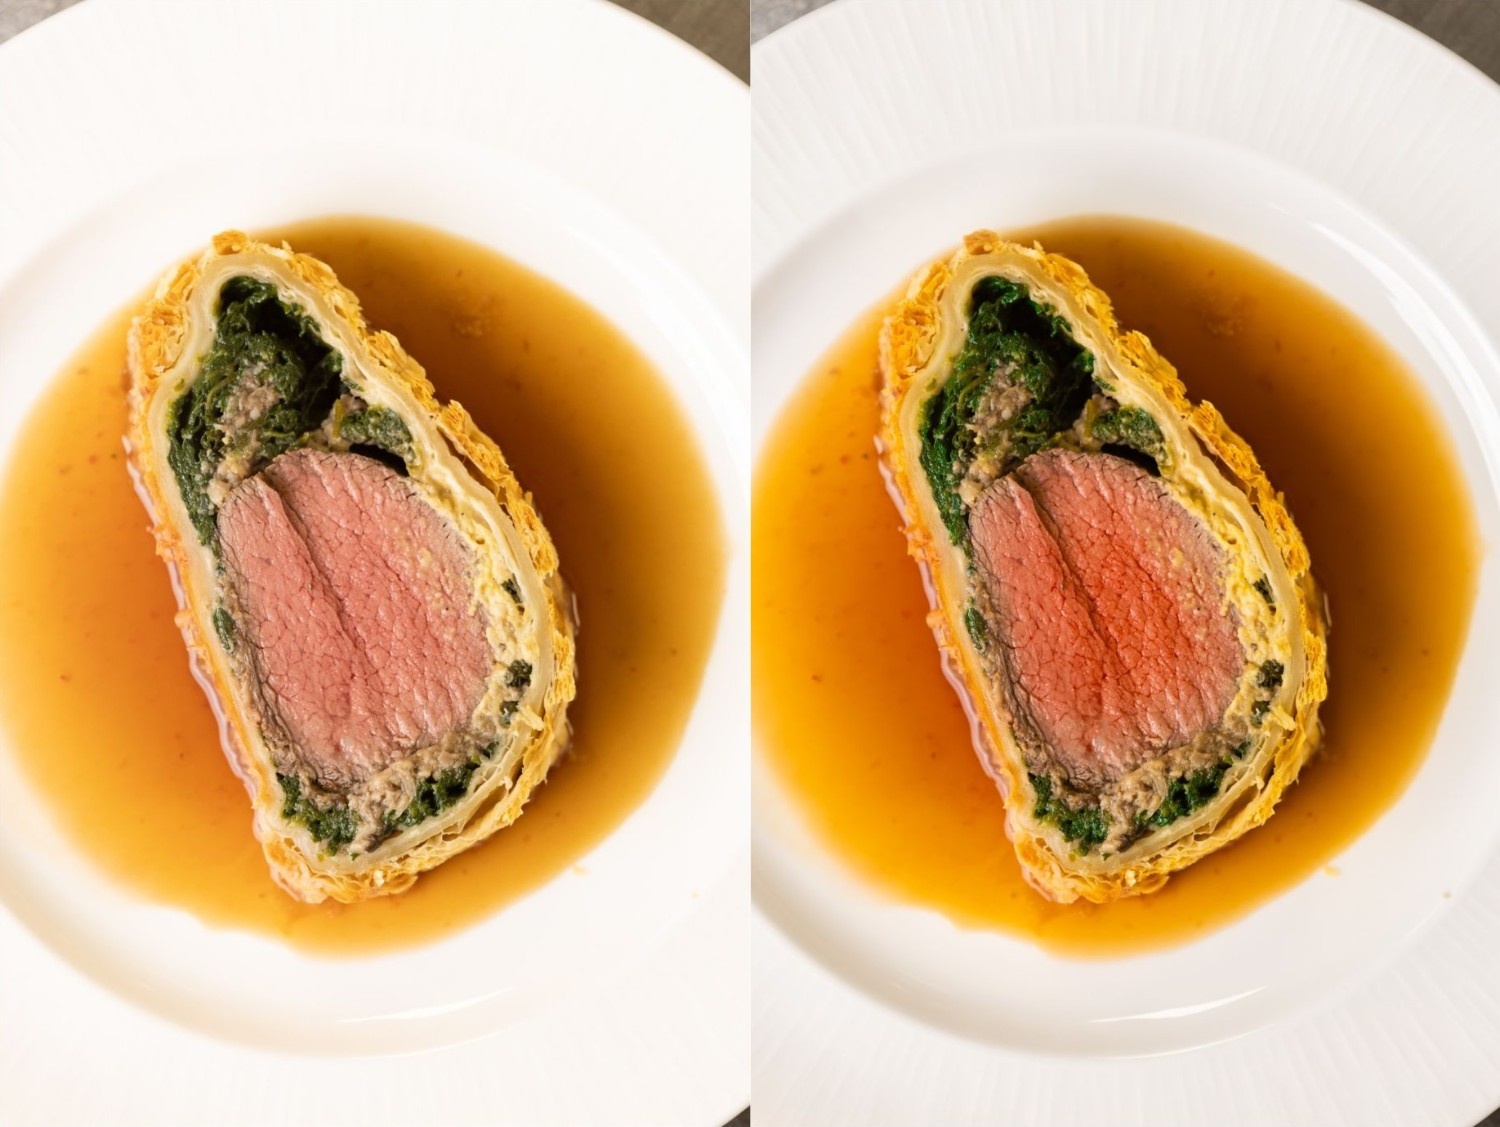
Step 3: Enhance Texture with Clarity & Sharpness
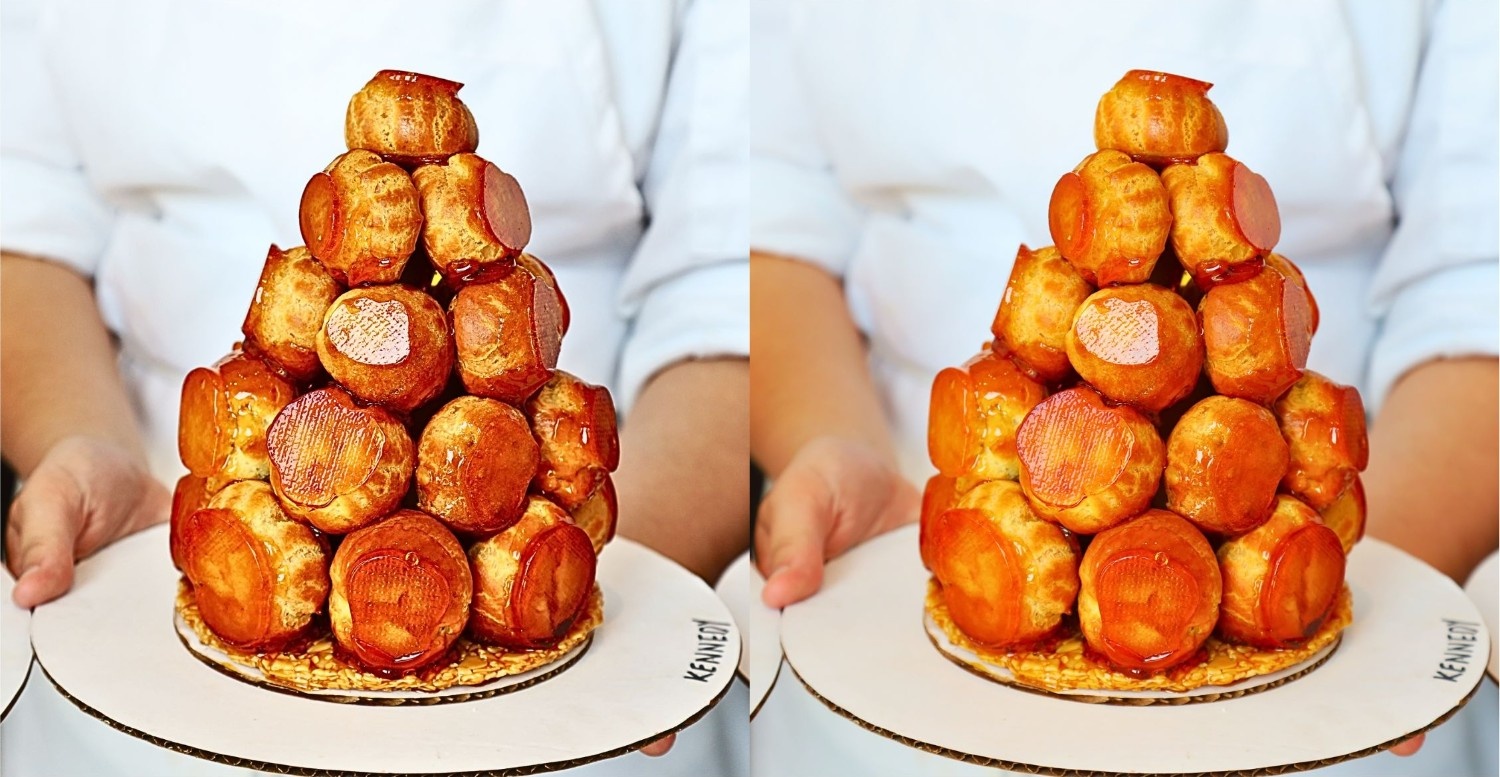
The flakiness of a croissant, the gooeyness of a melted marshmallow, or the caramelized edges of a croquembouche — texture helps viewers imagine what food feels and tastes like. Editing can emphasize these details.
Two settings adjust texture: clarity and sharpness.
- Clarity enhances midtone contrast, helping define edges.
- Sharpness makes fine details look more crisp.
“I like to save these edits for the end, because it’s more in the details than across the whole image,” Leo says. “Be careful not to go crazy with clarity and sharpness, otherwise your food can look artificial.”
Step 4: Develop Your Own Style
If editing for the first time, experiment with different styles and settings to see what you like. This exploration is part of developing a visual voice — something that can become just as recognizable as your cooking style.
The creative process in editing is similar to the ways in which chefs refine a dish before adding it to the menu. In the same way that a sauce or garnish may need polishing, photographers adjust individual settings to find a balance for the final product.
For Matt Hyland, ICE grad and chef/owner of New York City’s popular Emily and Emmy Squared, tinkering is where the fun is.
“The best part is the freedom to create,” he says. “It’s satisfying to make a dish that works, and honestly thrilling when one fails — because I learn from it and move on. It’s all part of the process.”
Not every dish makes the menu, and not every photo is a standout — but it all takes practice.
Keep Your Style Consistent
Consistency matters, especially when you’re using photography professionally.
Whether a private chef building a social media presence, a catering company marketing menus, or a student documenting their work, a singular editing style makes images cohesive. (In fact, several ICE alumni, including Steven Gao and Alessandra Ciuffo, have amassed large social followings by sharing photos and videos of their student experience in a consistent and recognizable format unique to their personal style.)
And if your style doesn’t fit with the above “rules?” Break them.
In his personal photography, Leo likes to oversaturate images (making colors overly vibrant, beyond what is natural). Other photographers may prefer slightly blurred photos that convey a soft, dreamy quality.
“If it supports the story and the vibe you’re aiming for, it can work,” says Leo.
Editing isn’t about perfection — it’s about polish. These small adjustments bring the thought and care you put into your cooking to your images.
But remember, the best editing starts with a great original shot. Keep practicing, keep experimenting and let your camera roll reflect just how good your food really is.