
Gabby is a student in ICE’s Culinary Arts program and our newest student blogger. She’s been cooking since before she was allowed to use the stove — making “soup” by using hot water from the sink to “boil” pasta and then throwing in some spices. Before culinary school, she received a bachelor’s degree in communications and human resources management from Rutgers University. She worked in marketing for a stint before launching her blog, “The Semi-Healthy Foodie,” and in October 2016, she finally decided to pursue her dream of going to culinary school and enrolled at ICE.
For her first blog post, she takes us through a daunting pastry lesson: Danish dough. 
Tackling Danish dough was one of the most challenging things I’ve had to take on in culinary school so far. When I think of a Danish, I think of buttery, flaky crust with a cheese or fruit filling. I think of the beautiful layers and the soft, chewy dough. Before culinary school, I casually enjoyed a Danish now and again, not thinking much of it.
Now that I know the time and effort that goes into making that perfectly layered dough, I have a new appreciation for pastry chefs (and their Danishes) everywhere. There is a certain technique and process that’s essential to get the dough just right.
Have you ever wondered how all of those buttery layers of dough are created? It may seem daunting, but with some time, patience and good instructions, it’s totally possible.
For starters, Danish dough is considered a laminate dough, which means that there are layers of fat encased in dough and each layer remains separate. The laminate dough process is tedious but so rewarding. Before I explain the process, here are a few key words to know: beurrage, detrempe and paton. The fat component of the dough is called beurrage, the dough component is called the detrempe and the act of making the dough and encasing the fat in dough is called paton.
 Okay, enough with the fancy words — let’s get to it.
- First, make a basic dough with yeast, sugar and cinnamon, and let it rest for about an hour.
- Next, make sure your butter is very cold and cut it into thin blocks. Flour the butter and line up the blocks of butter into a rectangle. Pound them together with a rolling pin until they form a sheet that is about 10-12 inches wide.
- Roll out the dough into a rectangle about one-third longer than your butter sheet. Place the butter sheet on the dough and fold into thirds like a letter. Roll the dough out, turn the dough 90 degrees and repeat the folding and rolling process. Rotate the dough again and repeat.
- Next, refrigerate the dough for at least an hour. Remove the dough from the refrigerator, roll it out and cut into 4x4 inch squares.
- When ready to bake, you can fill Danish dough with different fruits, jams or pastry creams.
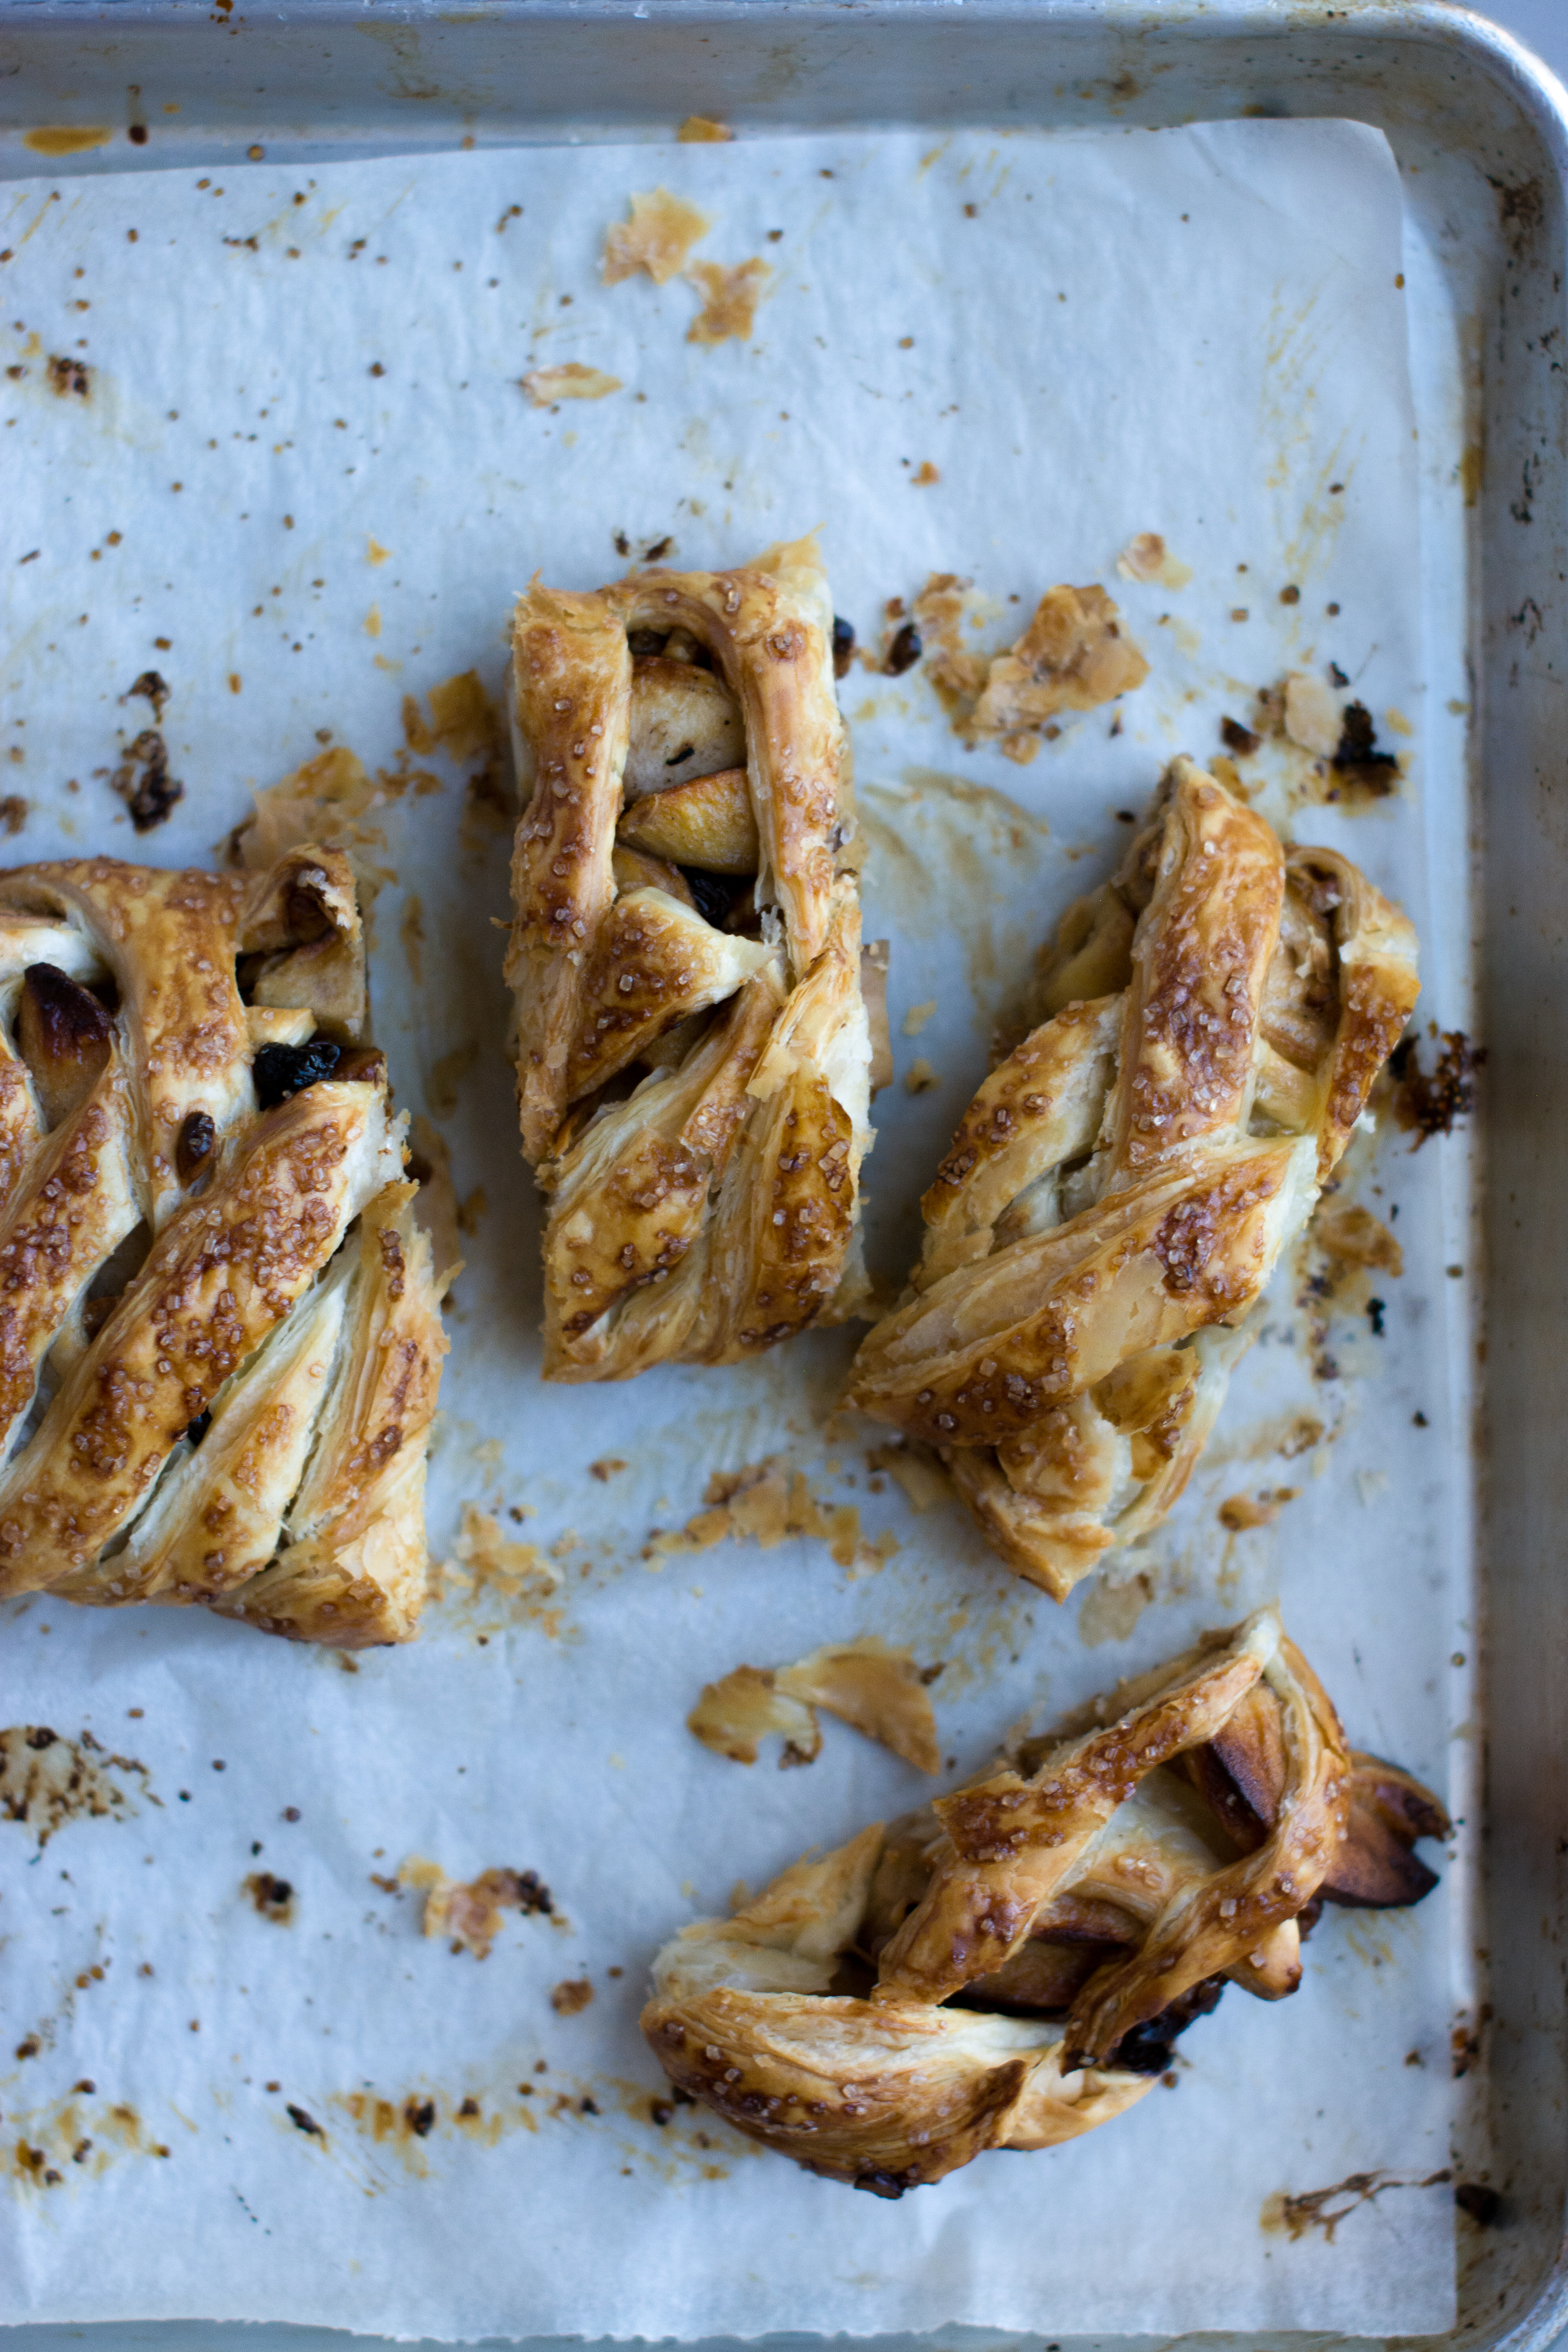
Once you break down the steps, the process is quite simple and the result is the flakiest Danish. Those layers of butter and dough create the amazing structure that made the Danish famous.
With this pastry lesson, not only did I master Danish dough, I also stepped out of my comfort zone, challenged my inner baker and acquired a new appreciation for Danishes and laminate doughs.
Ready to challenge your inner baker with professional culinary training from ICE? Click here for more information.