As any restaurant chef who has had their dishes featured in food magazines can attest, there is more than one way to write a recipe. No experience has made this statement more obvious to me than seeing my second cookbook, Modern Eclairs, published during the same period that I have been developing new cookie recipes for the professional pastry and baking program at ICE.
In short, I’ve had my foot in both worlds—professional restaurant chef and enthusiastic home cook—for years, and I’ve come to appreciate the significant differences between what we look for in recipes for these very different audiences.

Take, for example, a recipe that is currently in development for our professional pastry and baking program:
Spicy Cacao Cookies
- 280 grams butter
- 280 grams light brown sugar
- 225 grams sugar
- 100 grams eggs
- 10 grams vanilla extract
- Zest of two lemons
- 240 grams cake flour
- 240 grams bread flour
- 8 grams baking soda
- 6 grams baking powder
- 4 grams kosher salt
- 10 grams Sichuan peppercorns
- 6 grams ground Chinese Tung Hing cinnamon
- 100 grams cacao nibs
- Creaming method
- Chill dough
- Scoop and bake 350°F – 10 to 12 min
Keeping this recipe in mind, let's talk about structure and content:
More than one way to measure
The ingredients above are listed by metric weight. This is because it is faster and more precise—especially for the large format batches we find in professional kitchens—to scale a recipe’s ingredients up or down by weight rather than by volume.
In Europe, home cooks are accustomed to metric measurements, but many American cooks still opt for cups, tablespoons and teaspoons. However, change is a comin’: for my most recent cookbook, I included both volume and weight for all ingredients, as American “foodies” are increasingly interested in baking like the pros. Occasional bakers still find that as long as they stick to the recipe, using measuring cups and spoons is perfectly fine. The takeaway: home cooks want options.

Sourcing ingredients
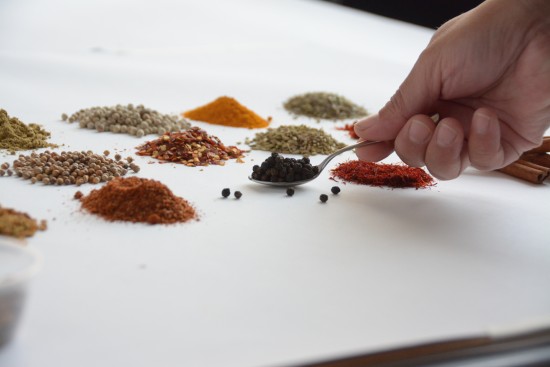
Professional chefs have access to hundreds of ingredients that cannot be purchased easily or affordably by a home cook (see Sichuan peppercorns and Chinese Tung Hing cinnamon, above). That stinks for home cooks and recipe developers alike.
No home chef wants to fall in love with an image in a cookbook, decide to make the recipe and then realize they have to schlep to five different stores and order ingredients online, instead of just being able to get in the kitchen and cook. For recipe writers looking to expose their audience to an exotic cuisine or advanced techniques, including these rare ingredients may be necessary. Whenever possible, the author should always offer an alternative ingredient, with a disclaimer that the results may be slightly different.
Eliminating the unnecessary
Have you ever encountered a recipe intended for home cooks that includes seemingly insignificant amounts of ingredients? For example, take a cookie dough that calls for one cup of milk and one tablespoon of heavy cream or three cups of all-purpose flour and ¼ cup bread flour. That is simply annoying. What is a home cook supposed to do with the remaining 31 tablespoons of heavy cream in the pint they purchased? When writing for professional chefs, you know you’ll use those ingredients again—and if you’re running a cost-efficient kitchen, you’d better find a way to do so.
But when writing for home cooks, try to use a little common sense and make the call on when or whether it’s important to stay 100% true to your original recipe. Instead of that extra ingredient purchase, just increase the milk in the recipe by a tablespoon or use an extra ¼ cup of all-purpose flour instead of the bread flour. Let’s not forget that the home cook rarely has the luxury of a walk-in refrigerator or a pantry stocked with every ingredient under the sun. Plus, if they are anything like me, as soon as they see a recipe that calls for a ton of ingredients, they’ll immediately turn the page and find something else to make.
All in the details
As you probably noted in my sample recipe, there are very few instructions. In fact, this recipe has more directions than usual because it is going to be tested by someone other than myself. A standard recipe for the professional kitchen simply includes the name of the recipe, the list of ingredients and a few words of direction: “creaming method.”
If I’m the executive chef or pastry chef of a restaurant, it’s typically up to my cooks to determine the yield of the recipe. I would assume my cooks already know that the dough should be chilled before baking. As for the portioning, bake time and temperature, they would be dictated by the application of the dough and left to the judgment of my sous chef or line cooks to determine. Obviously, a recipe written in this form is in no way acceptable for a home cook.
Of course, there are plenty of home bakers that know about the “creaming method”—though they may not know it by name. But an author must always assume their recipe is the first a reader has ever tried. Each stage of instruction for the home chef must include two things: a visual indication and an approximate time to aid the reader in knowing when each step is complete. For example: “Sear the sesame-crusted tuna over high heat, until the sesame seeds start to gain color, about one minute. Turn the tuna and continue to cook for one minute on each side until the sesame seeds are golden brown, but not burnt.”

Curb your enthusiasm
Last, and very importantly, I often forget when I start writing a book that I need to approach each recipe as though someone will actually make it. Yes, that sounds absurd. You’re probably wondering, “What is she talking about? She’s writing a cookbook. Of course her readers are interested in making the recipes!”
For a restaurant chef-turned-author, it can be all too easy to lose track of my audience and attempt to develop recipes that are overly complicated. It then comes as a surprise (although it shouldn’t) when I start testing my recipes in a home kitchen and realize that including such ridiculous and rigorous recipes will only make readers despise me as an author.
How do I keep myself in check? Those overly ambitious or tedious recipes either get completely cut from my cookbooks or morph into a dish that is much more approachable. It’s not a question of “dumbing down” the subject for my readers, but to make sure home cooks can replicate the results successfully. Let’s remember that cooking should be fun and not overly complicated—especially when it’s not your job.
After taking all this into consideration, let’s look at another cookie recipe that I’ve specifically written for home chefs. What are your thoughts on the differences between the two? Which makes you more excited to bake?
Chef Jenny’s Sprinkledoodle Cookies
Makes about 20 cookiesIngredients:
- 8 tablespoons (112 grams) unsalted butter, softened
- ½ cup (100 grams) granulated sugar, plus more for rolling
- 1 large egg
- 1 ⅓ cups (180 grams) unbleached all-purpose flour
- 1 teaspoon cream of tartar
- ½ teaspoon baking soda
- ¼ teaspoon salt
- ⅓ cup (75 grams) multicolored sprinkles
Directions:
- Position a rack in the center of the oven and preheat to 350°F. Line two baking sheets with parchment paper.
- In a large mixing bowl, cream the butter and sugar together until light and fluffy. Add the egg and mix until smooth. Stir in the flour, cream of tartar, baking soda and salt until smooth. Add the sprinkles and mix until just evenly combined.
- Roll cookie dough into heaping tablespoon-sized balls. Roll balls of dough in granulated sugar. Arrange on prepared baking sheets, about two inches apart.
- For chewy cookies, bake until very light golden brown on the edges, about 10 minutes. For crispy cookies, bake until a bit darker golden brown, 12 to 14 minutes. Let cookies cool on baking sheets.
Ready to start your professional pastry career? Click here to learn how you can study with Chef Jenny at ICE.


